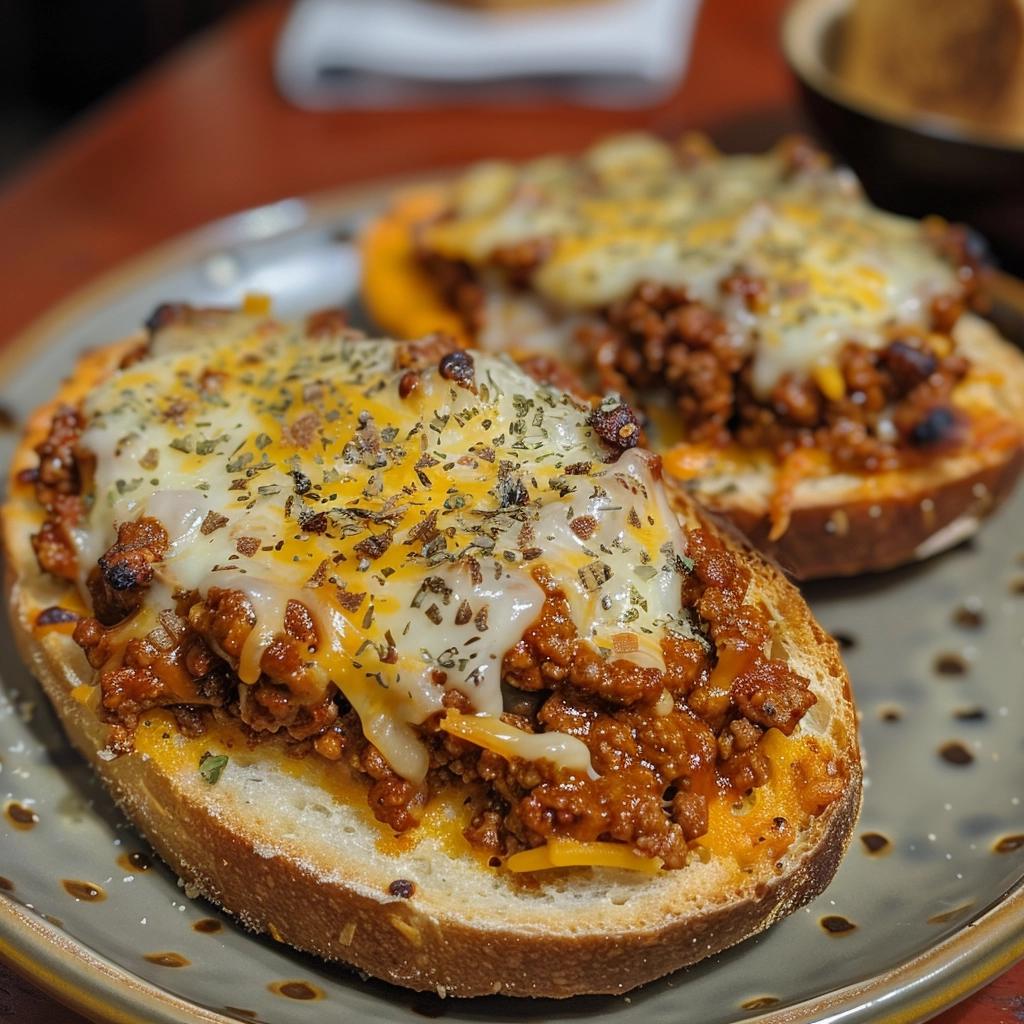
Open Faced Cheesy Sloppy Joes on Garlic Bread
I‘m excited to share a recipe that takes the classic sloppy joe sandwich and elevates it to new heights of deliciousness. Imagine the rich, savory flavors of sloppy joes, but instead of being tucked between sandwich buns, they’re piled high on a crispy, buttery bed of garlic bread and topped with melted cheese. This Open Faced Cheesy Sloppy Joes on Garlic Bread is a delightful twist on a traditional favorite, combining comfort food classics into one irresistible dish.
This recipe is close to my heart because it brings together the nostalgic flavors of sloppy joes—something my family has enjoyed for years—with a new, exciting presentation. I remember the first time I tried this version; it was on a cool autumn evening when I wanted something hearty and comforting, but with a bit of a gourmet touch. The combination of the rich, tomatoey beef mixture with the crispy, garlicky toast and gooey cheese was nothing short of magic. It was one of those meals that made everyone around the table sigh in contentment, and it quickly became a favorite in our household.
INGREDIENTS:
1 pound ground beef
1/2 cup diced onion
2 cloves of garlic, minced
2 tablespoons tomato paste
1 can (8 ounces) tomato sauce
1/2 tablespoon chili powder
1/4 teaspoon ground cumin
Optional: Dash of cinnamon
6 slices of frozen garlic Texas toast
1/2 cup shredded cheddar cheese
DIRECTIONS:
Step 1: Cook the Ground Beef
Brown the Beef: Heat a large skillet over medium heat. Add 1 pound of ground beef to the skillet. Use a wooden spoon or spatula to break up the meat into small pieces. Cook, stirring occasionally, until the beef is browned and no longer pink. This usually takes about 5-7 minutes.
Drain Excess Fat: Once the beef is fully cooked, drain any excess fat from the skillet. This will help keep the sloppy joe mixture from becoming greasy.
Step 2: Sauté the Vegetables
Add Onion and Garlic: To the browned beef, add 1/2 cup of diced onion and 2 cloves of minced garlic. Stir well and cook until the onion becomes translucent and fragrant. This usually takes about 3-4 minutes. The onions and garlic will add depth and a wonderful aroma to the meat mixture.
Step 3: Make the Sloppy Joe Sauce
Incorporate Tomato Paste and Sauce: Stir in 2 tablespoons of tomato paste and 1 can (8 ounces) of tomato sauce. The tomato paste will thicken the sauce and add a concentrated tomato flavor, while the tomato sauce provides a base for the mixture.
Season the Mixture: Add 1/2 tablespoon of chili powder and 1/4 teaspoon of ground cumin to the skillet. These spices will give the sloppy joe mixture its characteristic flavor. If you’re feeling adventurous, add a dash of cinnamon for a subtle hint of warmth and sweetness.
Simmer: Let the mixture simmer for 5-7 minutes, stirring occasionally. This allows the flavors to meld together and the sauce to thicken slightly. If the mixture becomes too thick, you can add a splash of water or beef broth to reach your desired consistency.
Step 4: Prepare the Garlic Toast
Bake the Garlic Texas Toast: While the beef mixture is simmering, prepare 6 slices of frozen garlic Texas toast according to the package instructions. Typically, this involves baking them in a preheated oven at 425°F (220°C) for about 5-7 minutes, or until golden and crispy.
Keep Toast Warm: Once baked, remove the toast from the oven and set aside. Keep the toast warm while you finish preparing the sloppy joe mixture.
Step 5: Assemble and Bake
Top the Garlic Toast: Place a generous portion of the sloppy joe mixture on each slice of toasted garlic bread. Spread the mixture evenly over the toast to ensure every bite is packed with flavor.
Add Cheese: Sprinkle 1/2 cup of shredded cheddar cheese over the top of each open-faced sandwich. The cheese will melt over the hot sloppy joe mixture, creating a gooey, irresistible topping.
Broil for Extra Flavor: If you prefer a bubbly, golden cheese topping, place the assembled open-faced sandwiches under the broiler for 1-2 minutes. Keep a close eye on them to prevent burning. This step will give the cheese a lovely, golden-brown finish.
Step 6: Serve and Enjoy
Garnish and Serve: Once the cheese is melted and bubbly, remove the sandwiches from the oven. Serve hot, garnished with fresh herbs if desired.
To Find Out All The Yummy Ingredients And The Step By Step Directions To Follow for this Delicious recipes,Please Head On Over To Next Page Or Open button